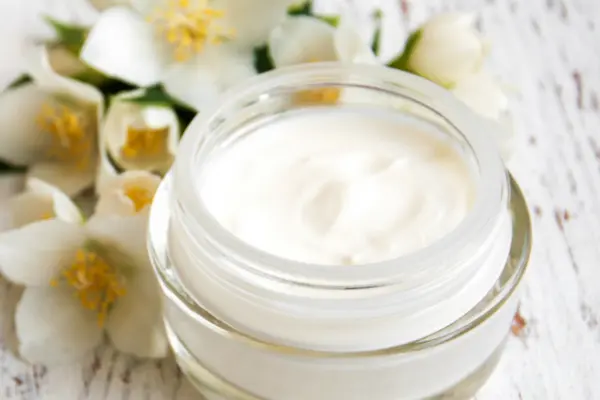
Are you tired of spending a fortune on commercial skincare products that promise miracles but rarely deliver?
Why not take matters into your own hands and create a luxurious and nourishing Goat Milk Face Cream Recipe at home?
In this article, we’ll guide you through a step-by-step process to craft your very own goat milk face cream recipe that will leave your skin feeling rejuvenated and glowing.
Benefits Of Goat Milk For Skin
Goat milk isn’t just a delightful addition to your morning cereal – it’s also a powerhouse of skin-loving nutrients.
This natural ingredient is loaded with vitamins, minerals, and fatty acids that can work wonders for your skin.
The lactic acid in goat milk acts as a gentle exfoliant, removing dead skin cells and promoting cell turnover.
Additionally, its high-fat content provides deep hydration, making it especially beneficial for dry and sensitive skin.
Goat Milk Face Cream Recipe
Gathering Your Ingredients
Before you embark on this DIY journey, it’s important to gather all the necessary ingredients. Here’s what you’ll need:
- Fresh goat milk (1/2 cup)
- Carrier oils (such as almond oil, jojoba oil) (1/4 cup)
- Emulsifying wax (1 tablespoon)
- Distilled water (1/4 cup)
- Shea butter (1 tablespoon)
- Coconut oil (1 tablespoon)
- Essential oils (lavender, chamomile, or your choice) (a few drops)
- Vitamin E oil (optional) (few drops)

Step-By-Step Recipe
1. Cleansing And Preparing Your Workspace
Before you begin, ensure that your workspace is clean and sanitized. Wash your hands thoroughly and gather all your utensils and equipment. This step is crucial to maintain the integrity of your DIY face cream.
2. Heating And Combining Oils
In a double boiler, gently heat the carrier oils, coconut oil, shea butter, and emulsifying wax until they are fully melted. Stir the mixture well to ensure all ingredients are combined.
3. Emulsifying The Cream
In a separate container, warm the distilled water. Slowly pour the water into the oil mixture while stirring continuously. This emulsification process is essential to achieve a creamy and smooth texture.
4. Adding Goat Milk And Essential Oils
Once the mixture has cooled down slightly, add the fresh goat milk and your chosen essential oils.
Essential oils not only add a pleasant aroma but also bring their own skin benefits to the cream.
5. Cooling And Storing The Cream
Allow the mixture to cool completely before transferring it into a clean, airtight container. You can store the cream in the refrigerator to prolong its shelf life.
Remember, since this cream contains natural ingredients and lacks preservatives, it’s best to use it within a few weeks.
Tips For Application And Storage
- Apply the goat milk face cream after cleansing your face thoroughly.
- A little goes a long way – use a small amount and gently massage it into your skin.
- Store the cream in a cool, dark place to preserve its potency.
Frequently Asked Questions (FAQs)
Can I Use Goat Milk Face Cream If I Have Oily Skin?
Absolutely! Goat milk face cream is suitable for all skin types. Its non-greasy formula provides hydration without clogging pores.
How Often Should I Use The Cream?
You can use the cream daily as part of your skincare routine, preferably in the morning and evening.
Can I Customize The Scent Of The Cream?
Yes, feel free to experiment with different essential oils to create a scent that you love.
Is Goat Milk Face Cream Safe For Sensitive Skin?
Yes, goat milk is known for its gentle nature, making it a great choice for sensitive skin types.
Can Men Use Goat Milk Face Cream?
Absolutely, skincare knows no gender! Goat milk face cream can benefit everyone seeking healthier skin.
Conclusion
Crafting your own goat milk face cream recipe is not only a rewarding DIY project but also a step towards healthier, more radiant skin.
By harnessing the power of natural ingredients, you’re creating a personalized skincare solution that’s as unique as you are.

Goat Milk Face Cream Recipe
Ingredients
- Fresh goat milk 1/2 cup
- Carrier oils such as almond oil, jojoba oil (1/4 cup)
- Emulsifying wax 1 tablespoon
- Distilled water 1/4 cup
- Shea butter 1 tablespoon
- Coconut oil 1 tablespoon
- Essential oils lavender, chamomile, or your choice (a few drops)
- Vitamin E oil optional (few drops)
Instructions
Cleansing And Preparing Your Workspace
- Before you begin, ensure that your workspace is clean and sanitized. Wash your hands thoroughly and gather all your utensils and equipment. This step is crucial to maintain the integrity of your DIY face cream.
Heating And Combining Oils
- In a double boiler, gently heat the carrier oils, coconut oil, shea butter, and emulsifying wax until they are fully melted. Stir the mixture well to ensure all ingredients are combined.
Emulsifying The Cream
- In a separate container, warm the distilled water. Slowly pour the water into the oil mixture while stirring continuously. This emulsification process is essential to achieve a creamy and smooth texture.
Adding Goat Milk And Essential Oils
- Once the mixture has cooled down slightly, add the fresh goat milk and your chosen essential oils. Essential oils not only add a pleasant aroma but also bring their own skin benefits to the cream.
Cooling And Storing The Cream
- Allow the mixture to cool completely before transferring it into a clean, airtight container. You can store the cream in the refrigerator to prolong its shelf life. Remember, since this cream contains natural ingredients and lacks preservatives, it’s best to use it within a few weeks.
- Jet’s Ranch Recipe: Make The Famous Dip At Home - April 12, 2025
- James Hemings Macaroni And Cheese Recipe – History On A Plate - April 3, 2025
- French Dip Squares Recipe – Better Than A Sandwich! - March 25, 2025


