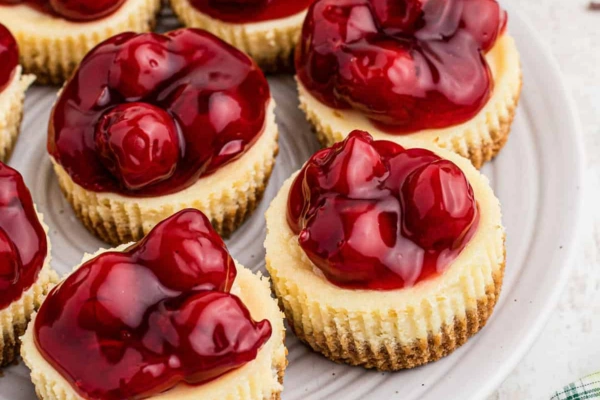
Every holiday season my family has a rule about desserts-it must include cheesecake. However, instead of the traditional huge cheesecake, I started making Mini Cherry Cheesecakes to keep things lively and tiny.
Now, these adorable little goodies are present at almost every gathering. They have the right ratio of crunchy bottom graham cracker crust, smooth cheesecake filling, and sweet cherry topping that makes every bite irresistibly delicious place, be it an established family tradition or a quick treat on a weekday!
How To Make Mini Cherry Cheesecakes In 30 Minutes
Mini Cherry Cheesecakes are very simple but indulgent desserts consisting of a crunchy graham cracker crust, rich cheesecake filling, and cherry pie filling as a perfect topping. Made in a muffin tin, these quick and easy-to-devour treats are great for birthdays, holiday celebrations, potlucks, or lounging at home when the sweet tooth calls.
Recipe Overview
- Prep Time: 15 minutes
- Cook Time: 20 minutes
- Total Time: 35 minutes
- Cuisine: American
- Course: Dessert
- Difficulty Level: Easy
- Yield: 12 mini cheesecakes
- Calories Per serving: ~180 kcal
Ingredients
For The Crust:
- 1 cup graham cracker crumbs
- 2 tbsp granulated sugar
- 4 tbsp unsalted butter, melted
For The Cheesecake:
- 8 oz cream cheese, softened
- 1/3 cup granulated sugar
- 1 tsp vanilla extract
- 1 large egg
For The Topping:
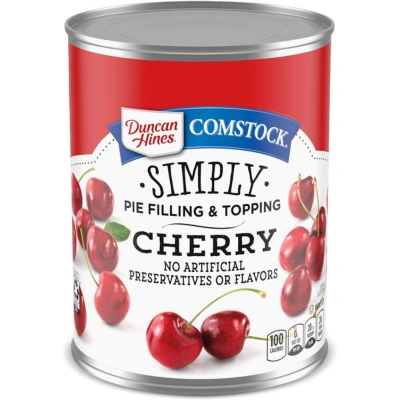
- 1 cup cherry pie filling
Pie Filling & Topping Cherry
Ingredient Notes:
- Graham Cracker: I recommend crushing the crackers into fine crumbs in a food processor as this is the best way texture for the crust works. If you are unable to find graham crackers, digestive biscuits work just fine, too.
- Cream Cheese: Make sure it is soft at room temperature for a smooth filling; lumps may form and affect the cheesecake’s texture if the cream cheese is cold.
- Cherry Pie filling: Cherry pie filling can be store-bought or homemade for a fresher flavor. For a richer taste, you could make cherry compote with fresh cherries, sugar, and some lemon juice.
Instructions
Step 1: Prepare The Crust
- Preheat the oven to 325°F (163°C). Prepare a muffin tin with cupcake liners.
- In a mixing bowl, combine graham cracker crumbs, sugar, and melted butter. Mix until it resembles wet sand.
- Using a spoon, add about 1 tablespoon of the mixture into each cupcake liner and work it firmly to create a base for the crust.
- Bake for 5 minutes and let it slightly cool, allowing it to set, so that when you pour in the cheesecake batter, it won’t crumble apart.
Step 2: Make The Cheesecake Filling
- In a mixing bowl, blend cream cheese and sugar until smooth and creamy.
- Add the vanilla extract and mix well.
- Add the egg and mix until fully combined. Do not over-mix. Over-aerating the batter can cause cracking.
Step 3: Assemble & Bake
- Spoon the cheesecake batter over the pre-baked crusts, filling each cup about three-quarters full.
- Bake for 15 to 18 minutes or until the centers are set but just barely jiggly.
- Let the cooled cheesecakes come to room temperature and refrigerate them for at least 2 hours. Cooling allows flavors to develop and properly sets the filling.
Step 4: Add The Cherry Topping
- Once chilled, top each cheesecake with a spoon of cherry pie filling.
- Serve chilled; enjoy! Best served directly from the fridge.
Video Tutorial:
Tips For The Best Mini Cherry Cheesecakes
- Use Room Temperature Ingredients: Room temperature ingredients will help avoid lumps in the cheesecake filling for a smooth texture.
- Don’T Overmix: Overmixing can incorporate too much air and cause the surface to crack.
- Chill for Maximum Flavor: Chilling in the fridge for some hours will improve the flavor and texture. The cheesecake would stand overnight in the fridge for a firmer texture.
- Muffin Tin Linings: Use cupcake liners for easy removal of cheesecakes and to prevent them from sticking.
Variations
With this cheesecake pie recipe, you can vary the flavors easily and give them your personal touch. For a non-cherry cheesecake pie, swap out the cherry pie filling for blueberry, strawberry, or raspberry.
Drizzle chocolate or caramel sauce on top for indulgence. Better yet, use chocolate graham crackers or crushed Oreos in place of regular graham crackers for a different flavor in the crust.
You can also add a bit of lemon zest for flavor and that splash of refreshing citrus Notes. To crown the masterpiece, coat it with whipped cream for gluttonous perfection.
Frequently Asked Questions
Can I Make These Cheesecakes Ahead Of Time?
Yes! Store them in an airtight container in the refrigerator for up to 4 days. They taste even better the next day as the flavors meld together.
Can I Freeze Mini Cherry Cheesecakes?
Yes! Freeze them without the topping for up to 2 months. Once thawed, add the cherry pie filling before serving. To thaw, place them in the fridge overnight.
What If I Don’t Have A Muffin Pan?
You can use silicone molds or a mini tart pan instead. Just make sure to grease the molds well to prevent sticking.
Can I Use Low-Fat Cream Cheese?
Yes, but the texture may be slightly less creamy. Full-fat cream cheese provides the best results.
Can I Make A No-Bake Version Of These Mini Cheesecakes?
Yes! Simply skip the baking step and refrigerate the cheesecakes for at least 4 hours to allow them to set properly.
The mini cherry cheesecakes are the ideal treat for all occasions: easy to prepare, full of flavor, and always a crowd-pleaser. For a holiday, birthday, or just to satisfy that sweet tooth, these cheesecakes are guaranteed to prove their worth.
Give them a try today and please comment on how they come out! Have fun baking!

Mini Cherry Cheesecakes – Simple Steps, Big Flavor!
Ingredients
For The Crust:
- 1 cup graham cracker crumbs
- 2 tbsp granulated sugar
- 4 tbsp unsalted butter melted
For The Cheesecake:
- 8 oz cream cheese softened
- 1/3 cup granulated sugar
- 1 tsp vanilla extract
- 1 large egg
For The Topping:
- 1 cup cherry pie filling
Instructions
Step 1: Prepare The Crust
- Preheat the oven to 325°F (163°C). Prepare a muffin tin with cupcake liners.
- In a mixing bowl, combine graham cracker crumbs, sugar, and melted butter. Mix until it resembles wet sand.
- Using a spoon, add about 1 tablespoon of the mixture into each cupcake liner and work it firmly to create a base for the crust.
- Bake for 5 minutes and let it slightly cool, allowing it to set, so that when you pour in the cheesecake batter, it won’t crumble apart.
Step 2: Make The Cheesecake Filling
- In a mixing bowl, blend cream cheese and sugar until smooth and creamy.
- Add the vanilla extract and mix well.
- Add the egg and mix until fully combined. Do not over-mix. Over-aerating the batter can cause cracking.
Step 3: Assemble & Bake
- Spoon the cheesecake batter over the pre-baked crusts, filling each cup about three-quarters full.
- Bake for 15 to 18 minutes or until the centers are set but just barely jiggly.
- Let the cooled cheesecakes come to room temperature and refrigerate them for at least 2 hours. Cooling allows flavors to develop and properly sets the filling.
Step 4: Add The Cherry Topping
- Once chilled, top each cheesecake with a spoon of cherry pie filling.
- Serve chilled; enjoy! Best served directly from the fridge.
- Jet’s Ranch Recipe: Make The Famous Dip At Home - April 12, 2025
- James Hemings Macaroni And Cheese Recipe – History On A Plate - April 3, 2025
- French Dip Squares Recipe – Better Than A Sandwich! - March 25, 2025
